
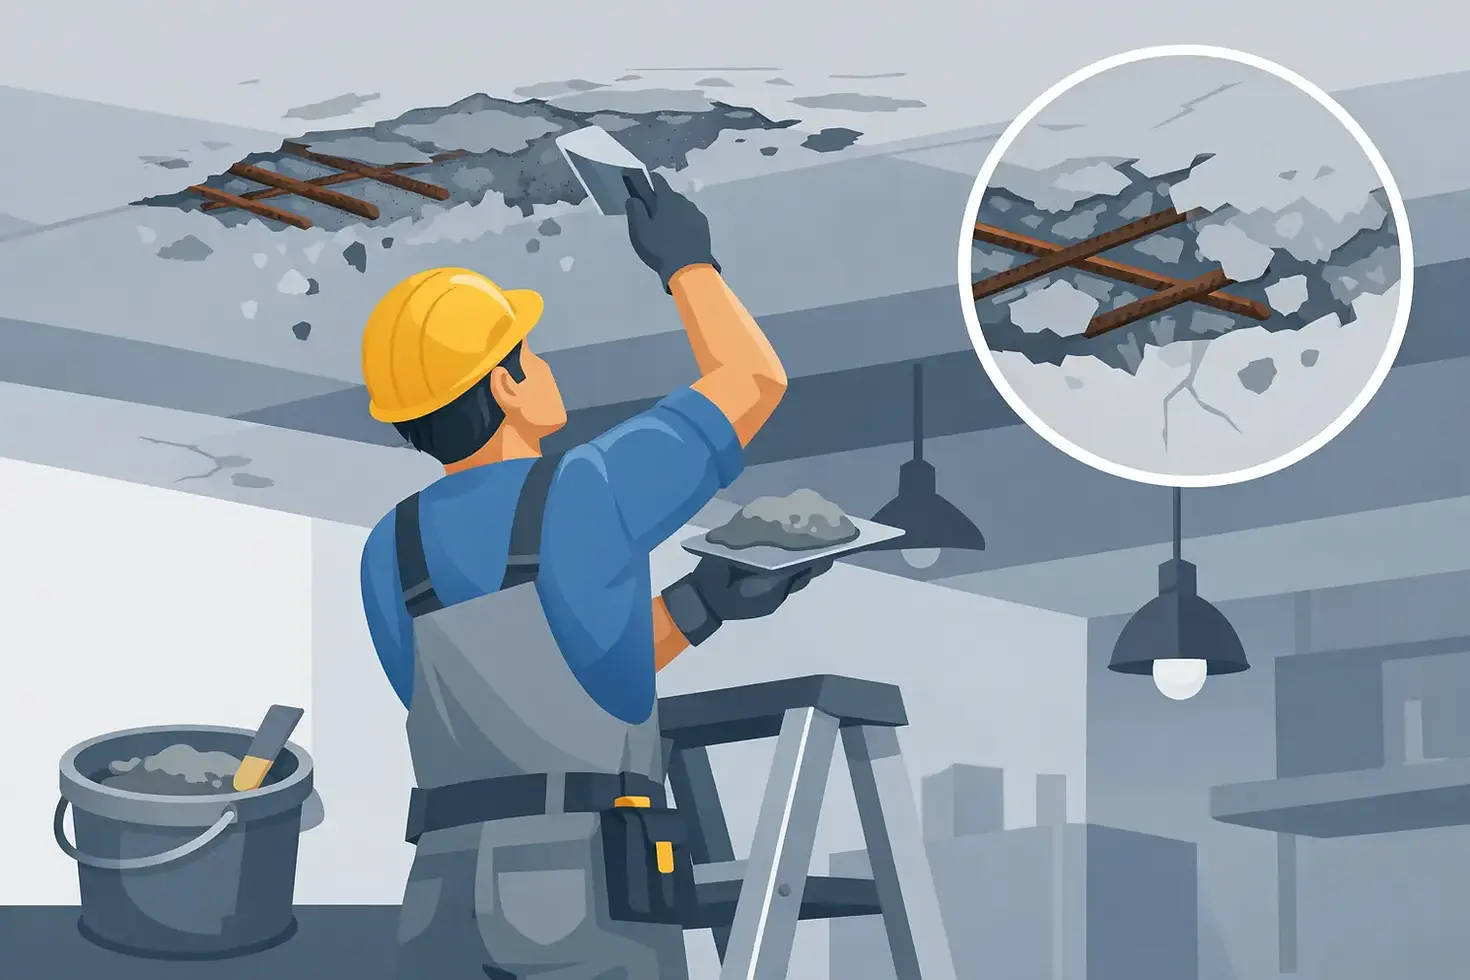
How to Repair Spalling Concrete Ceiling

A few small cracks on a concrete ceiling can turn into loose chunks faster than most homeowners expect. If you are searching for how to repair spalling concrete ceiling damage, the first thing to know is this: the visible flaking is only part of the problem. The real issue usually sits behind the surface, where moisture reaches the steel reinforcement and starts corrosion.
That is why a proper repair is not just patching over damaged spots with filler and paint. If the loose concrete is not fully removed, the rust is not treated, or the source of moisture is ignored, the damage often comes back. A clean-looking ceiling can fail again within months if the repair work is rushed.
What causes spalling on a concrete ceiling?
Spalling happens when the concrete surface breaks, cracks, or falls away, often exposing rusty steel bars inside. In many homes and small commercial units, this starts with water intrusion from the floor above, bathroom leaks, old waterproofing, poor drainage, or long-term humidity trapped in the slab.
Once moisture reaches the steel reinforcement, the steel begins to rust and expand. That expansion pushes against the surrounding concrete until the surface loses bond and starts popping, cracking, or dropping off in pieces. Sometimes the damage looks minor at first, with a hairline crack or a brown stain. Sometimes it is already severe, with visible rebar and hollow-sounding concrete around the affected area.
This is also why ceiling spalling should not be treated as a cosmetic defect. It is a repair issue first and a painting issue second.
How to repair spalling concrete ceiling the right way
A durable repair follows a sequence. Skipping steps may save time on day one, but it usually costs more later when the patch fails and has to be redone.
1. Check the extent of the damage
Start by inspecting the full area, not just the part that already fell off. Tap around the damaged spot with a light hammer or similar tool. Hollow sounds can indicate loose concrete that has not detached yet. Look for rust stains, bubbling paint, damp patches, and cracks spreading beyond the obvious break.
If the affected area is large, the concrete is actively dropping, or the steel reinforcement looks badly corroded, this is not a casual DIY patch. A contractor should assess it properly, and in more serious cases, a structural engineer may be needed.
2. Fix the water source first
This step is where many repairs fail. If water is still entering the slab from above, any patching work below is temporary. The ceiling might look fine after repair, but moisture will continue feeding corrosion behind the surface.
The source may be a leaking bathroom, cracked floor grout, failed waterproofing membrane, plumbing leak, or exterior seepage. Sometimes the ceiling damage appears in a living room, but the cause starts in the bathroom or balcony above. It depends on how water travels through the slab.
3. Remove all loose and weak concrete
The damaged concrete has to be hacked back until you reach solid material. This includes loose pieces, flaky edges, and weak surrounding areas that may still be attached but no longer sound solid. The goal is to create a stable repair zone, not just fill a hole.
This stage creates dust and debris, so the area below should be protected well. On occupied properties, neat preparation matters. Floors, furniture, and nearby walls should be covered before hacking begins.
4. Clean and treat the exposed steel
If reinforcement bars are exposed, they need proper cleaning. Rust should be removed with a wire brush, grinder, or another suitable method until the steel is cleaned back as much as practical. If corrosion is severe and the steel section has reduced significantly, that needs further evaluation before patching.
After cleaning, a rust inhibitor or anti-corrosion primer is usually applied to the exposed steel. This helps protect the reinforcement and improves the long-term performance of the repair.
5. Apply a bonding agent and repair mortar
Once the area is sound and clean, a bonding agent may be used to help the new material adhere to the old concrete. Then the patching is done with a suitable repair mortar, not a random wall filler. Ceiling repairs need a product that can bond well, resist shrinkage, and stay in place overhead.
The mortar is pressed firmly into the repair area in layers if needed. For deeper damage, the patch should be built up carefully rather than forced in all at once. Good workmanship matters here. A patch that is not compacted properly can leave voids, weak adhesion, or an uneven final surface.
6. Level the surface with plaster or skim coat
After the structural patch has cured, the repaired area is usually leveled to match the surrounding ceiling. This is where plastering skill shows. A ceiling can be technically repaired but still look rough if the finishing is uneven.
A skim coat may be applied over the repaired section, or across a wider area, to create a smooth and paint-ready surface. If there are multiple repaired spots, blending them into the whole ceiling often gives a cleaner result than touching up only the damaged patches.
7. Sand, seal, and repaint
After the surface dries properly, it is sanded smooth, sealed with the right primer, and repainted. For ceilings with past dampness issues, stain-blocking products can help prevent old discoloration from bleeding through the new paint.
Paint should always be the final step, not the repair itself. Fresh paint can hide defects for a short time, but it will not stop ongoing spalling.
When a DIY repair may not be enough
Some small repairs can be handled by experienced property owners, but many spalling ceiling cases are better left to a professional team. The work is overhead, dusty, and messy. More importantly, judging how far the damage extends is not always easy from the surface.
If the concrete keeps sounding hollow beyond the visible patch, if rebar exposure is significant, or if the leak source is unclear, professional repair is the safer route. The benefit is not just labor. It is having the hacking, rust treatment, patching, plastering, sanding, and repainting handled as one proper job instead of pieced together by different vendors.
That is often where customers save time and cost in the long run. A cheap patch can become an expensive repeat repair.
Common mistakes that cause repair failure
The biggest mistake is covering the area without removing weak concrete. The second is ignoring the moisture source. The third is using the wrong material, such as lightweight filler meant for hairline cosmetic defects instead of proper repair mortar.
Another common problem is poor finishing control. If the patched area is not leveled well, it can leave ridges, dips, or visible repair marks after painting. On ceilings, these flaws show clearly once light hits the surface.
Fast work is good only when the steps are still done properly. Rushed work is different.
Cost depends on more than patch size
People often ask for a repair price based on one photo, but ceiling spalling costs depend on several things. The visible hole size is only one factor. The final price can also change based on hacking extent, depth of damage, amount of exposed steel, leak-related work, access difficulty, protection setup, plastering area, and repainting scope.
A small isolated patch may be affordable if the cause is already fixed and the surrounding ceiling is still sound. A larger ceiling with multiple hollow spots, active water damage, and repainting across the full room will cost more because the labor and surface preparation are much heavier.
That is why a site check or clear photo review is the best way to get an honest estimate. Transparent pricing starts with seeing the real condition.
A smoother finish needs repair and finishing skill
Concrete ceiling spalling is not only about making the damaged area safe. It is also about restoring the ceiling so it looks flat, clean, and consistent again. That usually takes both repair knowledge and plastering experience.
Contractors who only patch concrete may leave a rough surface for someone else to fix later. Contractors who only paint may hide defects instead of solving them. When both repair and finishing are handled together, the result is usually neater and more efficient. That is a practical advantage for homeowners, shop owners, and renovation managers who want one team to take care of the full process.
If you are dealing with flaking concrete, rust stains, or falling ceiling pieces, do not wait for the damage to spread. Have the area checked, stop the source of moisture, and repair it properly from the base up. A good ceiling repair should leave you with more than a covered patch - it should give you a solid surface, a smooth finish, and peace of mind every time you look up.


Comments