

A Practical Guide to False Ceiling Installation

A cracked, stained, or uneven ceiling can make the whole room look tired, even after fresh paint. That is why this guide to false ceiling installation focuses on what actually matters on site - planning, structure, finish quality, and avoiding the kind of shortcuts that lead to sagging boards, visible joints, or future repair work.
False ceilings are not just for looks. Done properly, they can hide wiring, improve lighting layout, cover damaged slabs, reduce visual clutter, and create a cleaner finish for homes, shops, and small commercial spaces. But the final result depends heavily on the framing, board selection, joint treatment, and surface preparation. If any one of those is rushed, the ceiling may look good for a few weeks and then start showing cracks, uneven lines, or moisture problems.
Guide to false ceiling installation - start with the site condition
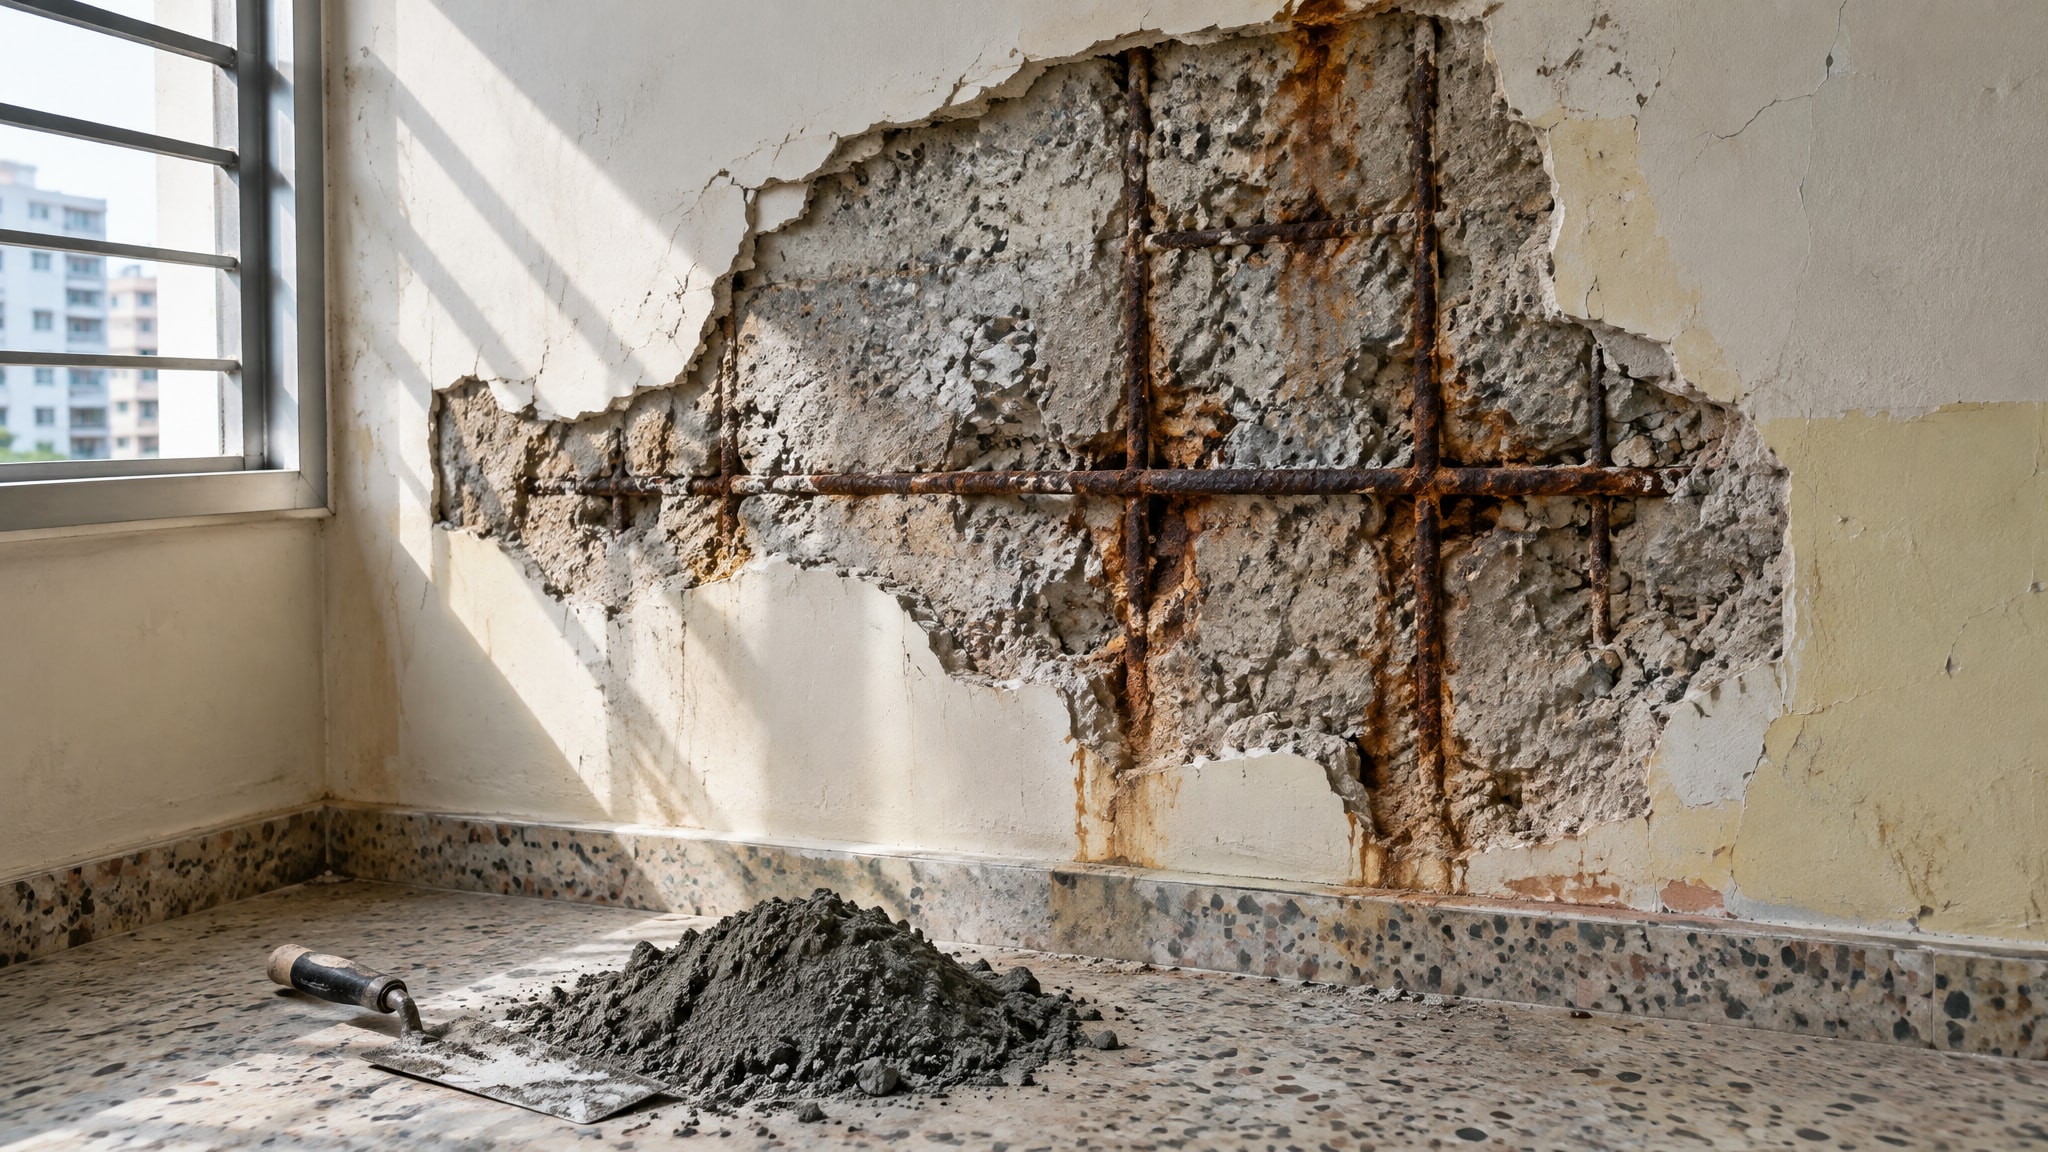
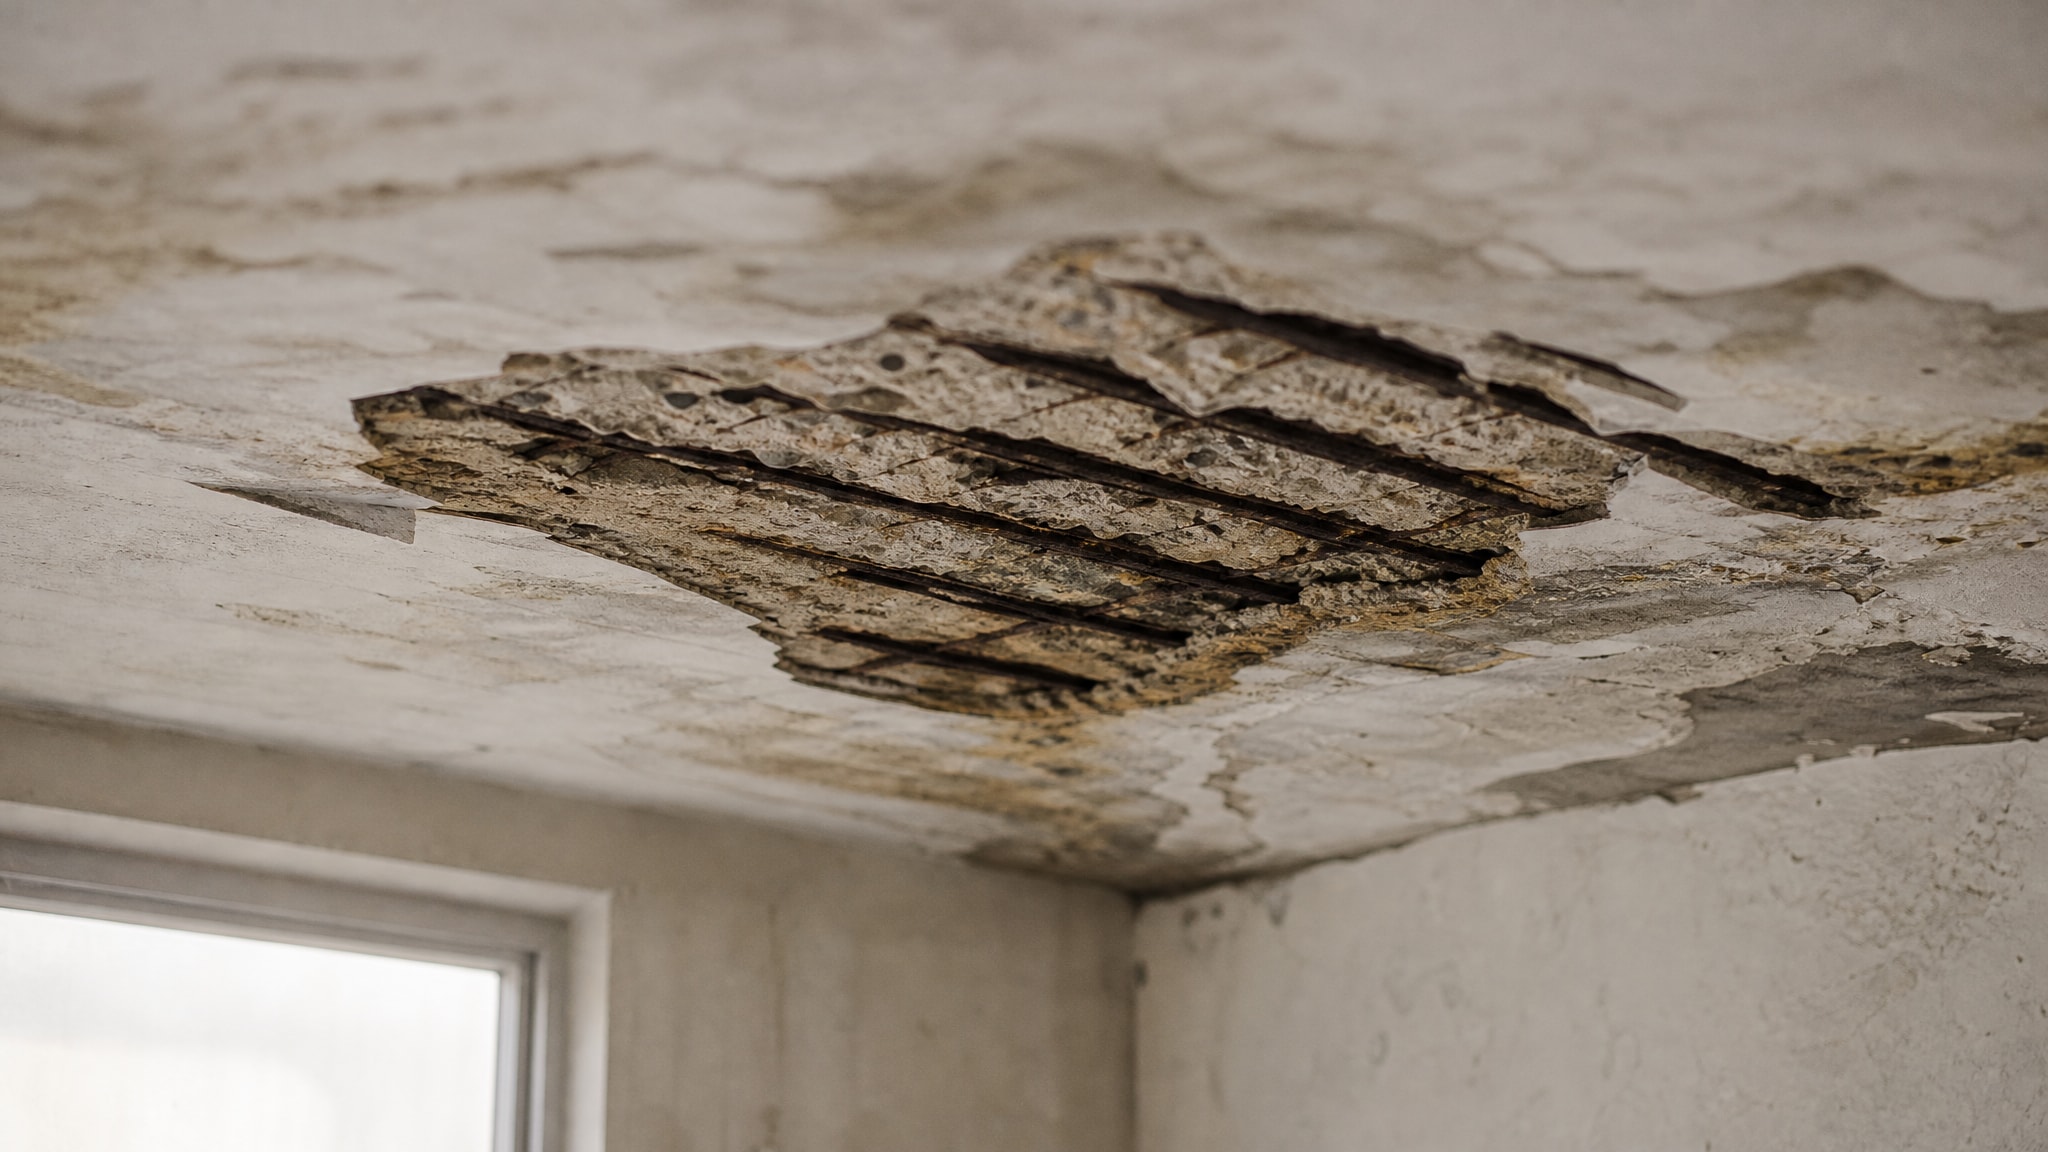
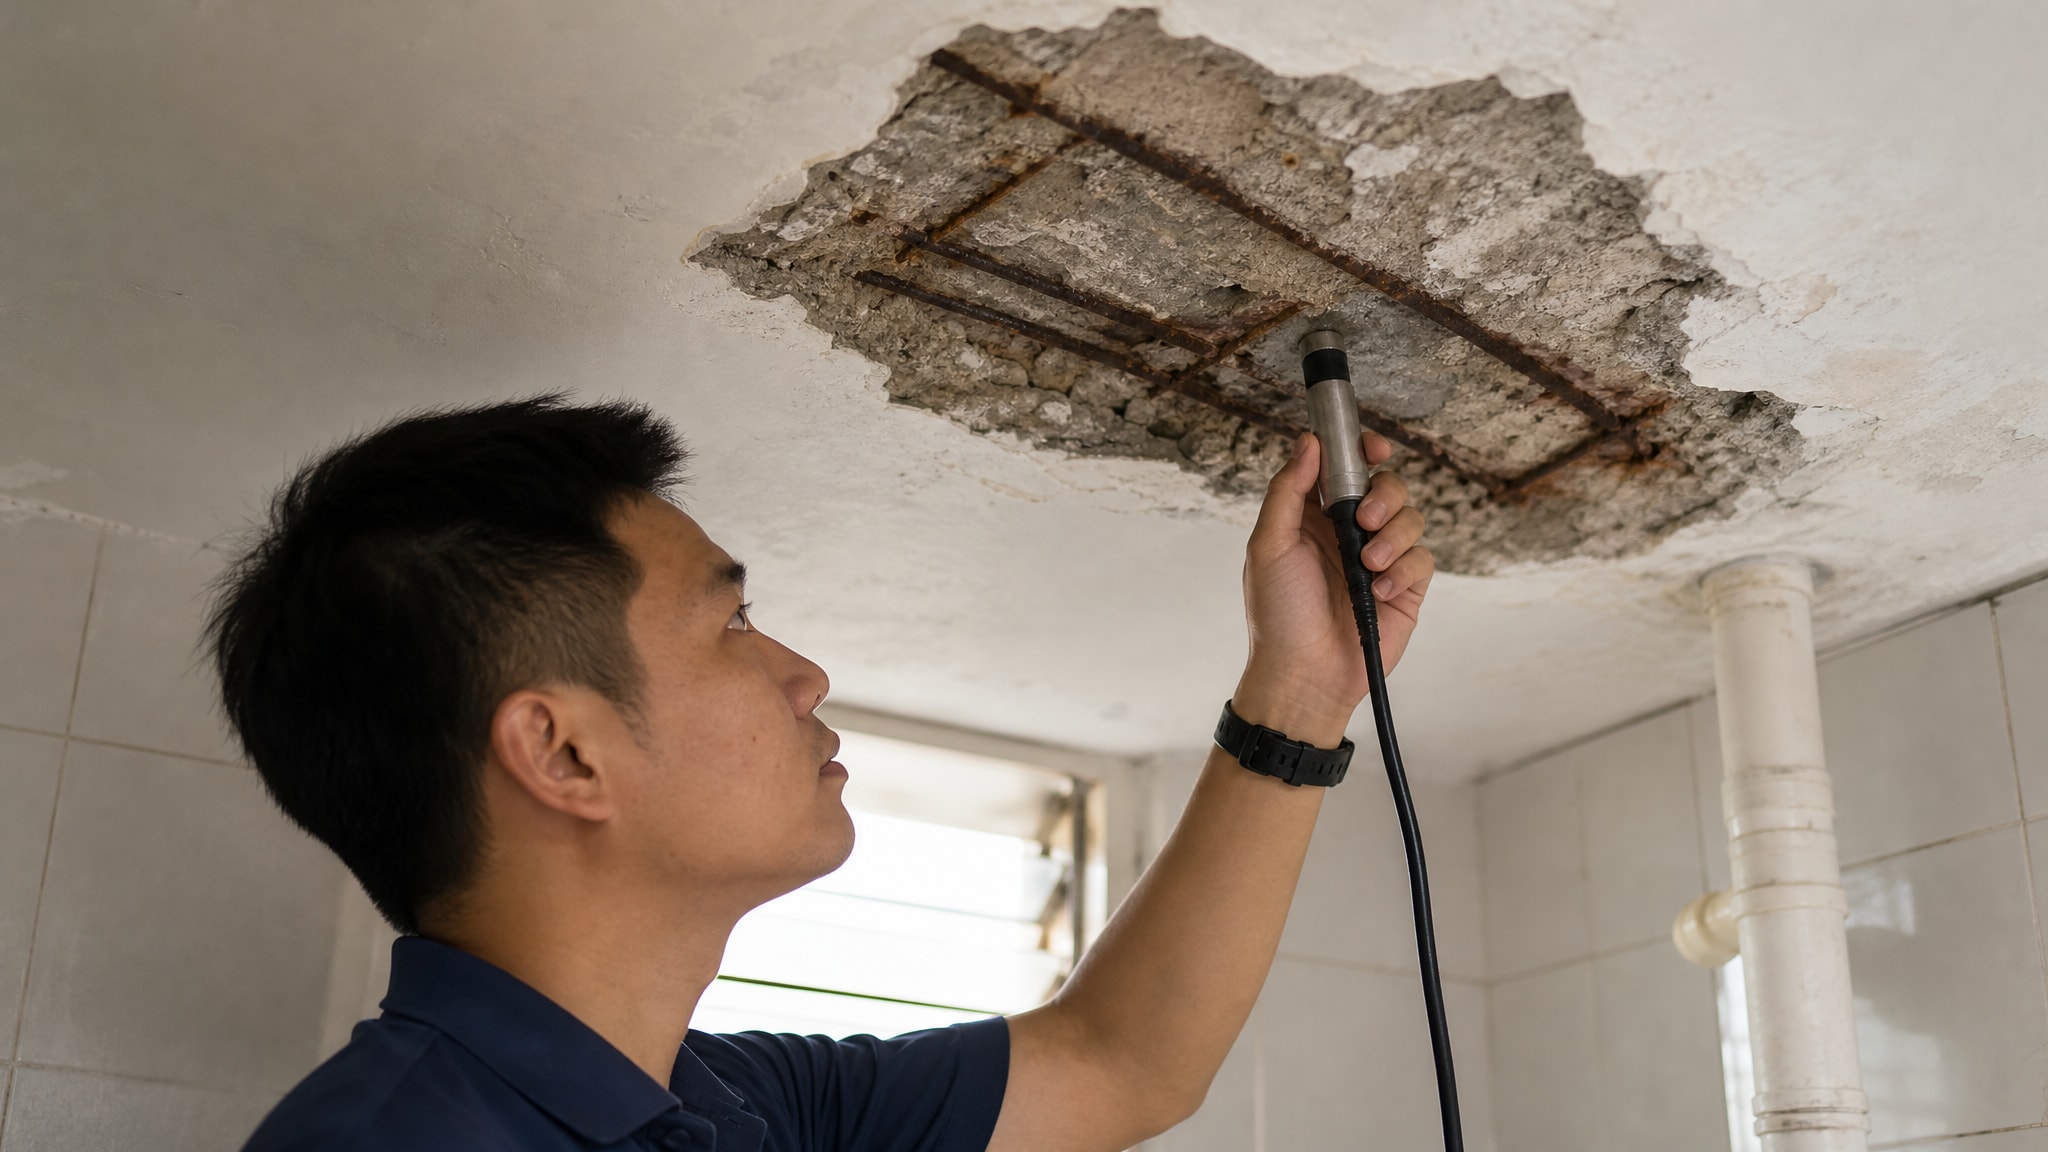
Before any framing goes up, the original ceiling has to be checked properly. This step gets skipped more often than it should. If there is an active leak, concrete spalling, mold growth, or loose plaster above, installing a false ceiling below it only hides the problem temporarily. The damage usually returns, and then removal and rework cost more than doing it right the first time.
The site inspection should confirm the ceiling height, slab condition, moisture risk, light point locations, and any piping, ducts, or wiring that need to be concealed. Room use matters too. A living room feature ceiling is different from a bathroom ceiling or a kitchen ceiling where humidity and maintenance are bigger concerns. In older properties, uneven slabs are common, so levels need to be marked carefully rather than assuming the existing ceiling is straight.
This is also the stage where the layout should be decided. Some owners want a simple flat false ceiling for a clean modern look. Others prefer a drop border, cove lighting, or recessed sections for spotlights. Simpler designs usually cost less, install faster, and are easier to maintain. More detailed profiles can look impressive, but they demand tighter workmanship and can create more joint lines where cracks may appear later if the framing or finishing is weak.
Choosing the right material and framing system
Most false ceiling installation work uses gypsum board on a metal frame, and for good reason. Gypsum gives a smooth finish, takes paint well, and works for many residential interiors. It is also practical when the job includes plastering, skim coating, and painting in one flow, because the final surface can be finished to a clean, consistent standard.
That said, material choice depends on the room. Standard gypsum board is common in dry areas such as bedrooms, living rooms, and offices. In bathrooms, kitchens, or spaces with higher humidity, moisture-resistant boards are a safer option. If the area has a history of leakage, fixing the water source comes first. No board type can compensate for an unresolved leak above.
For the framing, galvanized metal sections are widely preferred because they are straighter, more stable, and less likely to warp than timber. Good framing is what keeps the ceiling level and secure over time. Cheap or thin framing may lower initial cost, but it often leads to movement, loose fixing points, and visible unevenness once lights hit the surface.
Fasteners, joint tape, joint compound, corner treatment, and finishing products matter too. Many ceiling problems are not caused by the board itself but by poor jointing and weak surface prep. A ceiling always looks best when the structure and the finish are handled as one job, not treated as separate trades passing problems to each other.
How false ceiling installation is usually done
A proper false ceiling job begins with measurement and level marking. The contractor sets the finished ceiling height and checks the lowest points in the room so the frame does not clash with beams, pipes, or electrical runs. This is where planning for light fittings, access panels, air-conditioning openings, and curtain pockets should already be settled. Last-minute changes usually mean patching, cutting, and extra charges.
Once the levels are confirmed, the perimeter channels are fixed to the walls and the suspension system is installed. The spacing of the frame is important. Boards need enough support to prevent flexing, especially around recessed lights or larger spans. If the frame is out of level even slightly, the finished ceiling will show it clearly, especially under LED strip lights or downlights.
After the framing is complete, the boards are cut and fixed. Clean board alignment helps reduce unnecessary joints and gives a neater finish. Openings for lights, air vents, and access points should be measured accurately. Rough cutting around fixtures is one of the fastest ways to make a new ceiling look careless.
The next stage is joint treatment. This is where patience pays off. Joints are taped, compounded, dried, sanded, and checked again. In many jobs, this stage is rushed to save time, but that is exactly when hairline cracks and visible seams start forming later. A quality finish often requires multiple passes, especially if the goal is a smooth painted ceiling under bright interior lighting.
After jointing, the entire surface may receive skim coating or fine surface correction if needed to even out board transitions and improve paint readiness. Then comes sanding, primer, and paint. When plastering and painting experience are built into the same service team, the final ceiling tends to come out cleaner because the finishing is planned from the start, not patched after installation.
What affects cost and timeline
Homeowners often ask for a price per square foot, but false ceiling cost depends on more than area alone. Design complexity has a big effect. A plain flat ceiling is more affordable than one with multi-level drops, cove lights, curves, or many cutouts. Ceiling height also matters because higher work areas need more access equipment and labor.
Material grade changes pricing too. Standard boards, moisture-resistant boards, heavier framing, and better finishing products all affect the quote. Then there is the condition of the existing ceiling. If there is spalling concrete, peeling paint, water damage, or damaged plaster that needs repair before installation, that should be priced honestly instead of buried and ignored.
Electrical coordination can also add time and cost. If new light points, spotlights, LED strips, exhaust fans, or concealed wiring are part of the scope, those details need to be included early. A transparent quote should show what is included, what is excluded, and whether painting is part of the ceiling package or a separate item.
For a standard room with a simple design, installation can move fairly quickly. More detailed designs and repair-heavy sites take longer. Drying time between joint compound, skim coat, primer, and paint should not be compressed too much. Fast work is useful, but rushed finishing usually becomes visible later.
Common mistakes that cause callbacks
A false ceiling may look fine on handover day and still fail months later if the workmanship is weak. One common mistake is installing over active leaks or untreated mold. Another is using poor framing spacing, which allows movement and creates cracks at the joints.
Weak joint treatment is another major issue. If tape is skipped, compound is too thin, or sanding is uneven, the joints start showing through after painting. This is especially obvious under side lighting. Bad level control is also common in renovation work, where existing walls and slabs are not perfectly straight. A contractor has to work with real site conditions, not ideal measurements.
Some jobs also suffer because too many trades handle the ceiling separately. One team frames it, another patches it, another paints it, and nobody takes full responsibility for the finish. That is where service coordination matters. A contractor who understands repair, plastering, skim coating, and painting together can usually control the final result better.
When hiring a contractor, what should you ask?
Ask what board type and framing system will be used, whether moisture issues have been checked, and how the joints will be finished before painting. Ask if electrical openings and access panels are included, and whether the quote covers repairs to the original ceiling if damage is found.
It also helps to ask who handles the finishing work. A ceiling is not complete when the boards are fixed. The smoothness, straightness, and paint-ready finish are a big part of the job. If you are comparing quotes, do not look at price alone. Compare scope, material quality, and how clearly the contractor explains the process.
For owners who want cost control, the best approach is simple: choose a practical design, fix existing defects first, and get a clear site-based quote rather than guessing from photos alone. Companies like Lengpainter often work this way because a proper on-site check leads to fewer surprises, cleaner execution, and a more accurate price from the start.
A false ceiling should make the room look better and reduce future headaches, not create new ones. If the frame is solid, the surface is finished properly, and the hidden ceiling problems are handled before installation, the result stays neat for years and feels worth the money every time you switch on the lights.
Comments